Introduction
For the last year I’ve been learning and using SDL3 to build graphical applications. The API its one of the best I’ve ever seen, it includes many useful tools to quickly write cross-platform software. One of those components its SDLGPU, which it’s an abstraction over Vulkan, Metal and DX12 (they have support for other platforms as well). In general, SDLGPU helps you setup a GPU device, queue up operations (such copying buffers, rendering and computing), and manage the workflow of those operations. It is not a really complicated API but rather a bare-minimum required to show things on screen, it doesn’t even support raytracing. But noneless, is still a very powerful tool.
The source code will be available on github.com/cedmundo/slang-sdl3-example, feel free to fork it and use it as you find suitable in your projects.
SDLGPU and ShaderCross
ShaderCross is the way-to-go when using SDLGPU, since it is also maintained by the same team that writes SDL. It works, the idea is to write a shader in HLSL and then compile it down to HLSL/MSL/SPIR-V to then load it on runtime using SDLGPU. You can also compile the shader code on runtime too, if you include ShaderCross headers and libraries. This method is the default if you want to include cross-platform shaders in your application, but it is not the only one, you can actually write your shaders in other languages, let’s say WebGL, and compile them to SPRIV/HSLS/MSL and then load the binaries later, in runtime, using your own abstraction.
In our case, we will be using shader-lang, a language implementation by Khronos group that does the same as HLSL but also adds new features such generics, interfaces, modules and more.
Shader-lang
slang is a programming language to build applications that run on the GPU, it is still under development, but its already capable to make most graphical applications possible. Their syntax it’s quite similar to HLSL, but it has been curated to include new features, which should make writing GPU software a little bit easier.
It is a compiled programming language, this means that the source must be transformed before being uploaded to the GPU. One of the advantages of slang is that it targets many GPU layer implementations, including both binaries and text formats. Examples are Vulkan (SPIRV / GLSL), Metal (MSIL / MSL) and DX12 (DXIL / HLSL).
Slang and SDLGPU
Althrough it is possible, it is also a wee complicated to get working slang with SDLGPU, even though they are compatible, there are some considerations that must be taken before jumping in into the implementation.
The most important thing is to read the SDL3 documentation, specially the CreateGPUShader function which tells the expactations of memory layout for each shader.
SPIR-V
I will be focusing on SPIR-V / GLSL, still I think it is possible to include targets for other platforms, which I will try to add later since I don’t have access to Mac or Windows right now.
Requeriments
In order to build this application the following components are required:
- Any C11 compiler
- CMake 3.22.0+
- SDL3 (compiled 0.5.0). Binaries can be found on SDL3 page.
- slangc (compiled 2026.4.1-9-g5cde9ea5f). Binaries can be found here
- Vulkan SDK (probably already available in your OS).
Phase 1: Create window and swapchain texture
On this phase we’ll build a very basic application that shows a window and renders a clear color on screen. Nothing more.
Project structure
slang-sdl3-example
├── CMakeLists.txt
└── main.c
CMake project
This is a very simple cmake project file:
cmake_minimum_required(VERSION 3.22)
project(slang-sdl3-example
  VERSION "1.0.0"
  DESCRIPTION "Example of slang with SDL3"
  LANGUAGES C)

# CMake options
set(CMAKE_C_STANDARD 11)
set(CMAKE_EXPORT_COMPILE_COMMANDS ON)

# Vendored dependencies
find_package(SDL3 REQUIRED CONFIG REQUIRED COMPONENTS SDL3)

# Main target
add_executable(slang-sdl3-example)
target_sources(slang-sdl3-example PRIVATE main.c)
target_link_libraries(slang-sdl3-example PRIVATE SDL3)
If you find issues linking with SDL3, try SDL3-shared instead. Or if you have
problems with resolving math symbols, try adding m to target_link_libraries.
Main file
For this example, we will be using main callback functions.
Let’s start with the include files:
#include <SDL3/SDL_assert.h>
#include <SDL3/SDL_error.h>
#include <SDL3/SDL_events.h>
#include <SDL3/SDL_gpu.h>
#include <SDL3/SDL_init.h>
#include <SDL3/SDL_log.h>
#include <SDL3/SDL_rect.h>
#include <SDL3/SDL_video.h>

#define SDL_MAIN_USE_CALLBACKS
#include <SDL3/SDL_main.h>
Now some helpful definitions:
#define WINDOW_TITLE "Slang + SDLGPU Example"
#define WINDOW_HEIGHT 500
#define WINDOW_WIDTH 500

typedef struct {
  SDL_Window *window;
  SDL_GPUDevice *device;
  SDL_GPUViewport viewport;
} ExampleApp;
We are creating this ExampleApp, however feel free to name it as you need (Game, App, etc). This is the context for the entire application. For the init function we will init SDL, create the window and GPU device and finally claim the window for the device.
SDL_AppResult SDL_AppInit(void **appstate, int argc, char *argv[]) {
  (void)argc;
  (void)argv;

  if (!SDL_Init(SDL_INIT_VIDEO)) {
    SDL_Log("Error: SDL_Init(): %s", SDL_GetError());
    return SDL_APP_FAILURE;
  }

  ExampleApp *app = SDL_malloc(sizeof(ExampleApp));
  if (!app) {
    SDL_OutOfMemory();
    return SDL_APP_FAILURE;
  }

  *appstate = app;
  app->window = SDL_CreateWindow(WINDOW_TITLE, WINDOW_WIDTH, WINDOW_HEIGHT, 0);
  if (app->window == NULL) {
    SDL_Log("Error: SDL_CreateWindow(): %s", SDL_GetError());
    return SDL_APP_FAILURE;
  }
  app->viewport =
      (SDL_GPUViewport){.x = 0, .y = 0, .w = WINDOW_WIDTH, .h = WINDOW_HEIGHT};

  app->device = SDL_CreateGPUDevice(SDL_GPU_SHADERFORMAT_SPIRV, true, NULL);
  if (app->device == NULL) {
    SDL_Log("Error: SDL_CreateGPUDevice(): %s", SDL_GetError());
    return SDL_APP_FAILURE;
  }

  if (!SDL_ClaimWindowForGPUDevice(app->device, app->window)) {
    SDL_Log("Error: SDL_ClaimWindowForGPUDevice(): %s", SDL_GetError());
    return SDL_APP_FAILURE;
  }

  return SDL_APP_CONTINUE;
}
Now, for each iteration we want to:
- Acquire a command buffer.
- Acquire GPU swapchain texture (to render to window’s framebuffer).
- Create a render pass and clear the color texture.
- Submit all work.
SDL_AppResult SDL_AppIterate(void *appstate) {
  ExampleApp *app = (ExampleApp *)appstate;
  SDL_assert(app != NULL);

  SDL_GPUCommandBuffer *cmdbuf = SDL_AcquireGPUCommandBuffer(app->device);
  if (cmdbuf == NULL) {
    SDL_Log("Error: SDL_AcquireGPUCommandBuffer(): %s", SDL_GetError());
    return SDL_APP_FAILURE;
  }

  SDL_GPUTexture *swapchain_texture = NULL;
  if (!SDL_WaitAndAcquireGPUSwapchainTexture(cmdbuf, app->window,
                                             &swapchain_texture, NULL, NULL)) {
    SDL_Log("Warning: could not acquire GPU swapchain texture");
  }

  if (swapchain_texture != NULL) {
    SDL_GPUColorTargetInfo color_target_info = {0};
    color_target_info.texture = swapchain_texture;
    color_target_info.clear_color = (SDL_FColor){0.2f, 0.2f, 0.5f, 1.0f};
    color_target_info.load_op = SDL_GPU_LOADOP_CLEAR;
    color_target_info.store_op = SDL_GPU_STOREOP_STORE;

    SDL_GPURenderPass *render_pass =
        SDL_BeginGPURenderPass(cmdbuf, &color_target_info, 1, NULL);
    {
      SDL_SetGPUViewport(render_pass, &app->viewport);

      // Render anything else ...
    }
    SDL_EndGPURenderPass(render_pass);
  }

  SDL_SubmitGPUCommandBuffer(cmdbuf);
  return SDL_APP_CONTINUE;
}
We are only handling quit events:
SDL_AppResult SDL_AppEvent(void *appstate, SDL_Event *event) {
  ExampleApp *app = (ExampleApp *)appstate;
  SDL_assert(app != NULL);

  switch (event->type) {
  case SDL_EVENT_QUIT:
    return SDL_APP_SUCCESS;
  case SDL_EVENT_WINDOW_CLOSE_REQUESTED:
    if (event->window.windowID == SDL_GetWindowID(app->window)) {
      return SDL_APP_SUCCESS;
    }
    break;
  }
  return SDL_APP_CONTINUE;
}
And don’t forget to destroy everything after we terminate:
void SDL_AppQuit(void *appstate, SDL_AppResult result) {
  ExampleApp *app = (ExampleApp *)appstate;
  if (app == NULL) {
    return;
  }

  SDL_DestroyGPUDevice(app->device);
  SDL_DestroyWindow(app->window);
  SDL_Log("Info: Terminated with result: %d", result);
}
To make sure everything is working fine, run the following commands to build the application:
$ cmake -B cmake-build-debug -S . && cmake --build cmake-build-debug
-- The C compiler identification is GNU 11.4.0
-- Detecting C compiler ABI info
-- Detecting C compiler ABI info - done
-- Check for working C compiler: /usr/bin/cc - skipped
-- Detecting C compile features
-- Detecting C compile features - done
-- Configuring done
-- Generating done
-- Build files have been written to: /home/carlos/Projects/Misc/slang-sdl3-example/cmake-build-debug
[ 50%] Building C object CMakeFiles/slang-sdl3-example.dir/main.c.o
[100%] Linking C executable slang-sdl3-example
[100%] Built target slang-sdl3-example
Then we should be able to run the binary:
$ ./cmake-build-debug/slang-sdl3-example
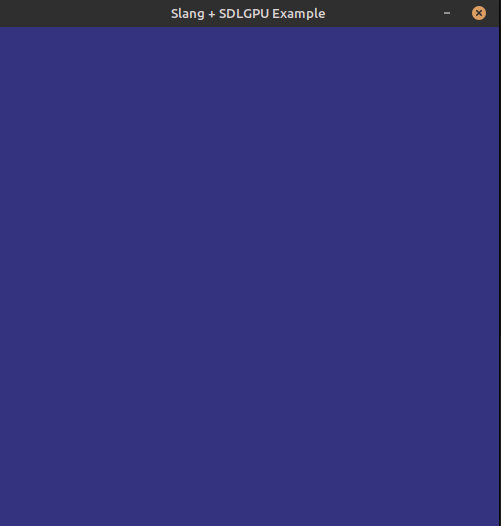
If succeed, a window should appear with a nice blue as background:
If you have issues running the program, try copying the DLLs (or SOs) in the same directory of the
binary (cmake-build-debug in my case).
Next steps
Now you have a nice window using SDL3 and SDLGPU, please read the next part here.